Hardware setup
Tags
Tags are the devices that are positioned in a Pozyx setup. To perform positioning, they require anchors in their range to perform range measurements, from which a position is calculated. These typically move around, and can be powered using a small battery or power bank.
When working with the Creator Controller, one Pozyx device, be it a tag or anchor, has to be connected to the computer running the software. This device fulfills the role of master device, and is in control of all UWB communications in the setup. You can always change which device you connect to your computer, but for a first setup it makes sense to connect one of your tags.
The other tags you have can simply be powered by a battery.
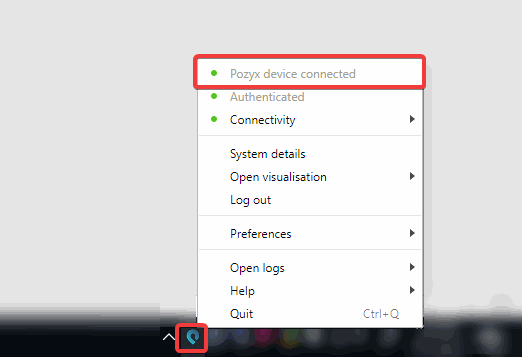
When you connect the tag to your computer, you can verify that it’s connected via the tray application, as it will change its icon and its menu will state that a device is connected. If your tag does not get recognized, you may have to try a different USB cable or follow the detailed troubleshooting when you click ‘No Pozyx device connected…’ in the tray application.
Anchors
Anchors are Pozyx devices that are intended to never move and act as reference points for the tags and their positioning algorithm.
Installing the anchors and what to look out for is explained in detail in the anchor setup guide. With the Creator Controller, you can easily auto-calibrate the anchors, so you don’t have to worry about measuring the anchors’ exact locations.
If you are done with setting up your hardware and have all devices powered up, you’re ready to go to the next step: discovering your devices and auto-calibrating your anchors.
Placing the anchors
The Pozyx positioning system requires that at least four anchors are placed around/inside the area where you will be positioning. The accuracy of the system depends a lot on the quality of the setup, which should follow these rules of thumb:
Place the anchors high and in line of sight of the tag(s).
Spread the anchors around the area, never all on a straight line! Example: the corners of a room.
Keep the distance between two anchors in a range of 2 - 20 meters.
Keep the anchors at least 20 cm away from metal.
Place the anchors vertically with the antenna at the top or bottom.
Optional:For 3D positioning: place the anchors at different heights.
If you want to perform auto-calibration, try to have line of sight between your anchors as well.
Before you install the anchors (with the provided Velcros or screws) on the walls or ceiling, it is usually a good idea to make a small sketch of the room, writing down the anchors’ IDs and sketching where they will be placed. You can find the network ID as the hexadecimal number on the label adorning your anchor.
Remember that, for optimal antenna performance, it is recommended to place the anchors vertically with their antenna at the top, and to orient your tags that will be positioning vertically as well. Also make sure that no heavy metal objects are placed near the antenna, as this might degrade performance. We stress this again because it's just that important.
You can find a full explanation of every rule further below. We'll first go over why you should either autocalibrate or measure your anchor coordinates.
Calibration vs measuring
There are two essential ways in figuring out your anchor’s coordinates, and both have their advantages. To get started with positioning, we provide a world-class anchor autocalibration in our Creator Controller.
The resulting anchor positions should be accurate enough for most setups, providing accurate positions, and taking away the difficulty and time necessary to measure out your anchor positions. For complex setups where it’s hard to measure anchor coordinates, this is especially valuable.
Autocalibration is however not always the right solution. When you have an environment where the anchors don’t have a line of sight connection with their neighbors, or are too far away, the autocalibration quality will be lower and so will the positioning accuracy. In these cases, you can measure out the anchor coordinates yourself, preferably with accurate equipment like a laser measurer or total station.
If you have an offline installation or don’t want to work with the Creator Controller, you will also need to measure the coordinates.
The ideal case
In an ideal case, you will be positioning in a single room that doesn’t have too many objects inside of it, allowing for clear line of sight between the devices.
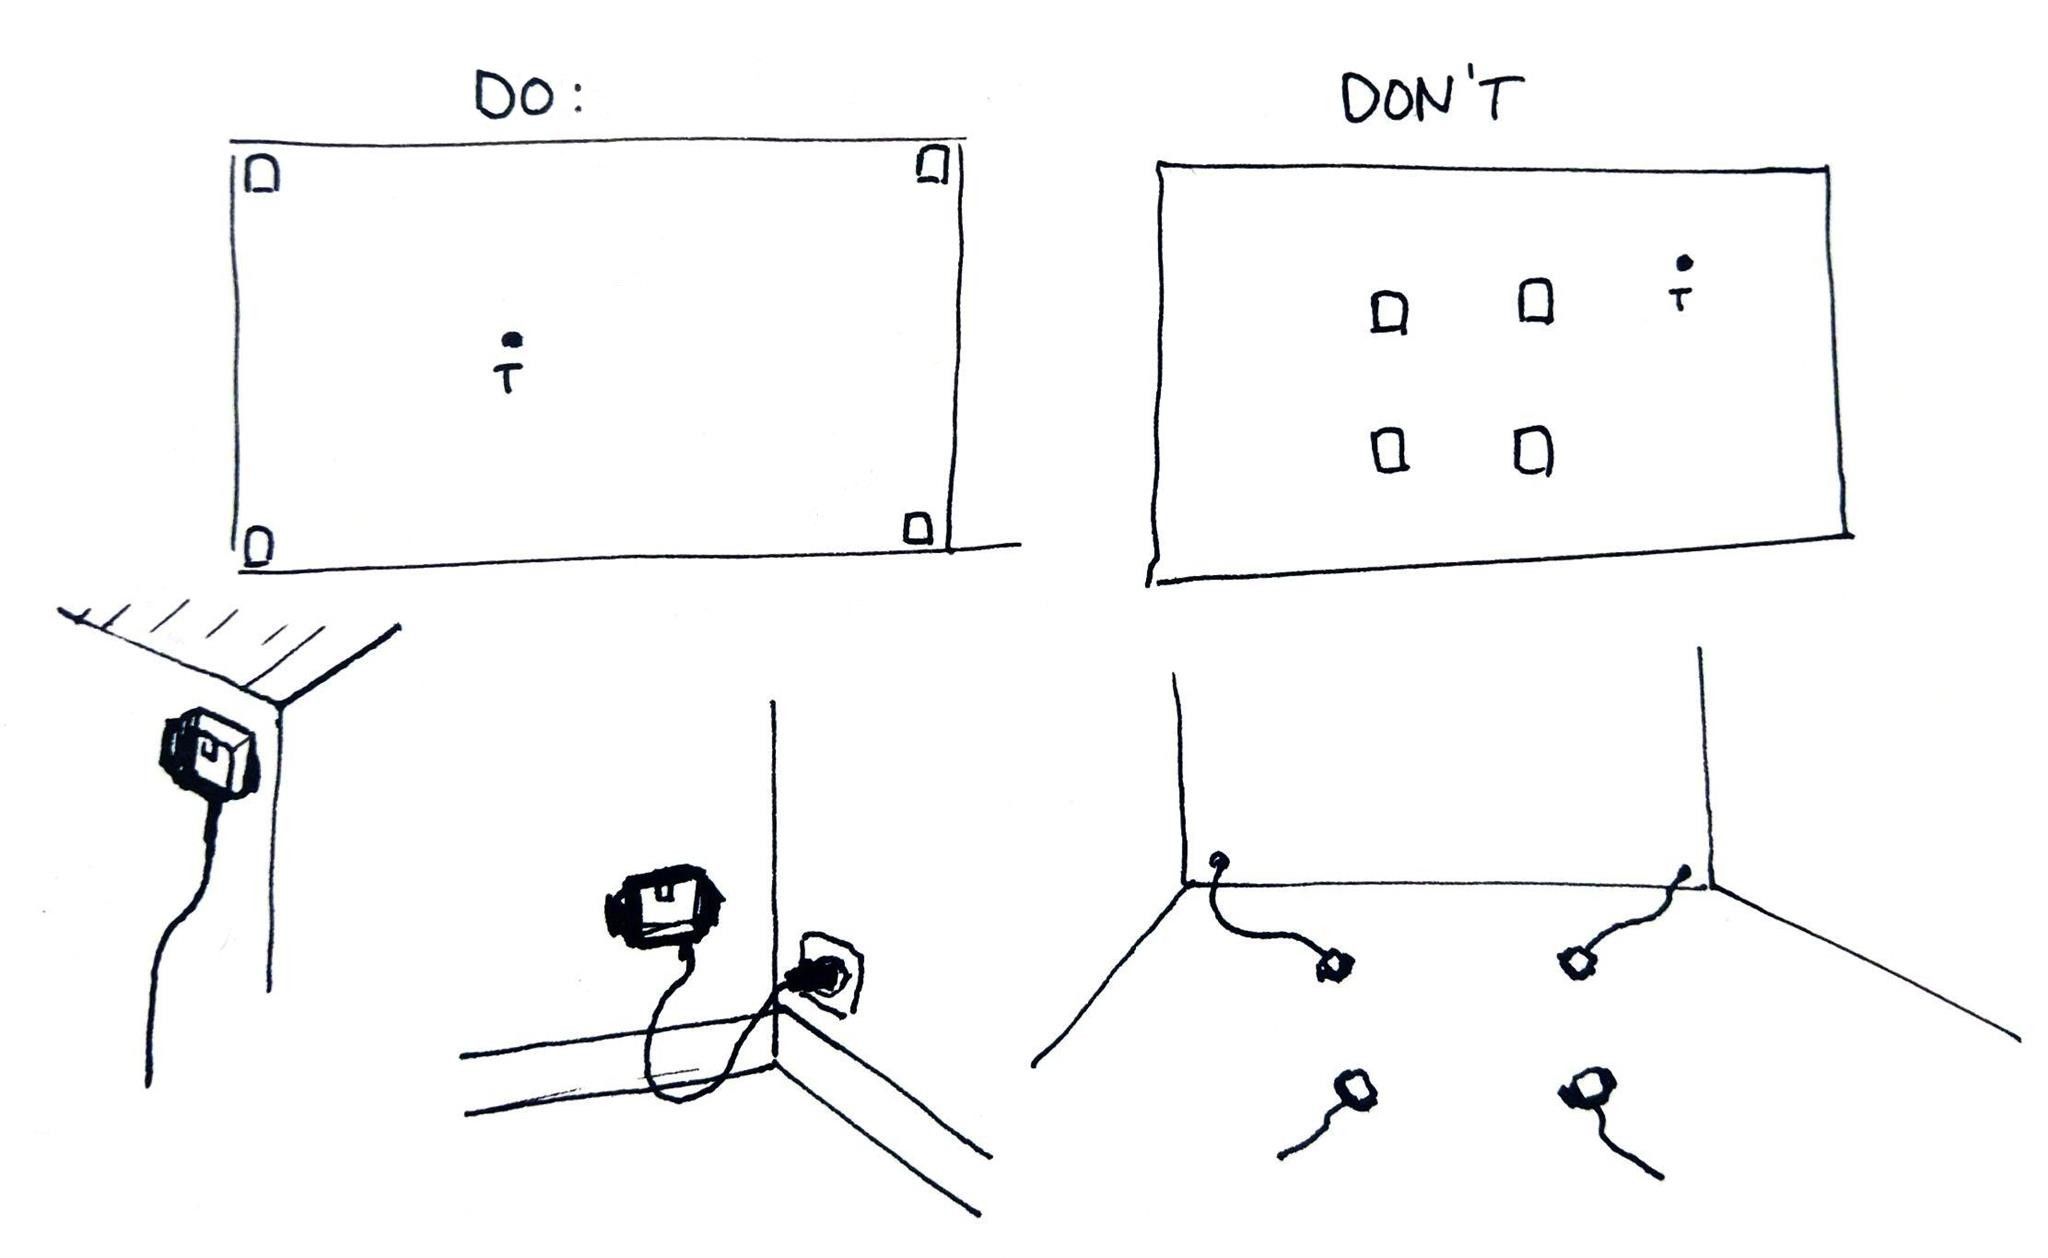
The image below illustrates the layout you should get when you follow the rules of thumb: an anchor in every corner so that every point inside the room is inside the anchor’s bounding box, and every anchor can have optimal transmission.
The anchors on one diagonal should be near the ceiling, while the anchors on the other diagonal should be near the ground. This way, the anchors do not form a 3D plane and the positions can’t be mirrored (see rule 6). If you’d choose to manually measure your anchor coordinates, a setup like this makes defining coordinates a lot easier as well.
On the right, the anchors are thrown on the ground and the tag is being positioned outside of the anchor’s bounding box. Because of the worse antenna transmission, the proximity of the anchors and positioning the tag outside of the anchor’s enclosing area, the positions here will be considerably worse than the setup on the left.
The realistic case
Only few setups have an ideal environment and layout as below. When tracking over a large area, you will have anchors inside of the area to have a better coverage.
Especially when tracking in multiple rooms or with many (metal) obstacles, it’s important to try to have 4 anchors within range and in line of sight of the tag in all areas where you want to perform accurate positioning.
The rules explained
Rule 1: Place the anchors high and in line-of-sight of the user
The first rule is straightforward: placing the anchor high (on the ceiling or on the walls) increases the chance of receiving a good signal because there are less obstructions. Obstructions generally have a negative influence on the accuracy of the range measurements which has a direct effect on the positioning accuracy.
Rule 2: Spread the anchors around the area, never all on a straight line!
For range-based systems, a single range measurement will only give information in a single direction. This direction is exactly the direction from the user to the anchor. Because of this, it is best to spread the anchors such that they cover all directions. If the anchors are all on a straight line, the positioning error will be very large. This can be seen on the image below. You can see that a small change in radius (for example due to noise), will result in a very large change in the position of the intersection(s). In other words, the error on the range measurements is amplified! This is the same principle as in GPS, where it is called the geometric dilution of precision (GDOP).
Rule 3: Keep the distance between two anchors in a range of 2 - 20 meters
To make sure you have the best coverage and accuracy (see Rule 2), it’s important to spread out your anchors as much as possible. On the default UWB settings, a maximum range between the anchors of 20 meters is recommended so that your tag will always be in range of your anchors.
Additionally, the ranging measurement algorithm performs better when the devices are further apart, so it’s best to keep some distance between the tag and anchors for improved accuracy. This is important for anchors as well if you want to perform autocalibration.
Rule 4: Keep the anchors 20 cm away from metal
When you place an anchor directly on a metal plate, the metal will affect the antenna behavior. It is advised to keep a distance of 20cm clear from the antenna with metal. The antenna itself is a metal conductor that is carefully designed to radiate on the UWB frequencies. Any metal nearby will reduce the antenna's efficiency or will make the antenna less omni-directional and less predictable. This rule is in fact true for every wireless system.
Rule 5: Place the anchors vertically with the antenna at the top or bottom
The Pozyx system uses wireless UWB signals for positioning and this requires an antenna. However, it is physically impossible to create an antenna that performs good in all directions. The monopole antenna (the white chip) on the Pozyx devices radiates omni-directionally in the xz-plane, but doesn't radiate as well along the y-axis (see figure). To make sure that we have the best possible reception, it is recommended to place the anchor vertically. Note that the same is true for the Pozyx tags. The ranging algorithm inside the tag is also optimized for this orientation.
Rule 6: For 3D positioning: place the anchors at different heights
The anchors need to be placed at different heights to be able to discern an accurate z coordinate, this follows the same principle as Rule 2, but applies to the z-axis while Rule 2 applied to the x and y accuracy.
Note that in a typical room, with line of sight considerations, the anchors can be placed between 1 and 2 meters height and the z-accuracy may not match the x and y accuracy.
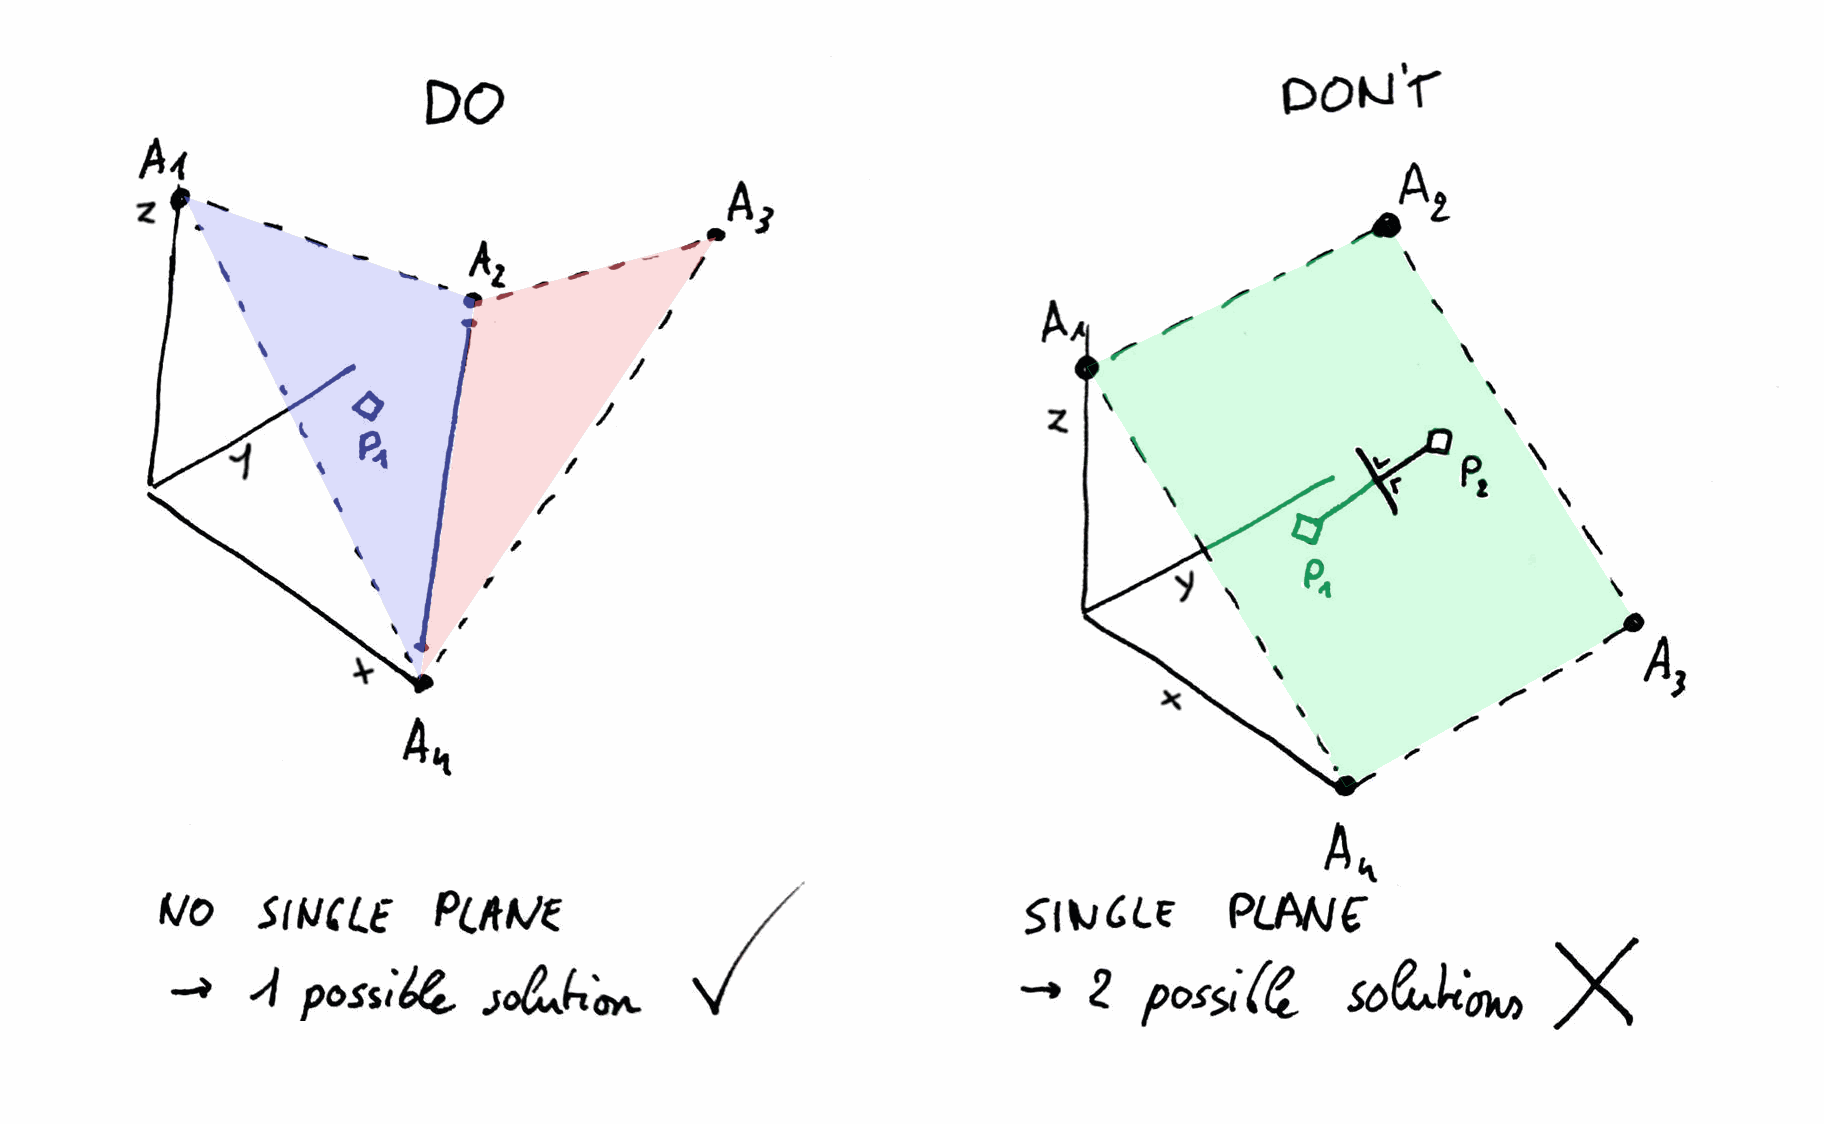
It is also important that the anchors do not lay in the same 3D plane, as this creates a mirror plane for the tag’s position, causing the tag’s position to jump around to its real and mirrored positions. This is visualized on the right side below.
Rule 7: If you want to perform auto-calibration, have line of sight between your anchors
The autocalibration relies on range measurements between the anchors. If the anchor can not accurately range with each other, or don’t have enough anchors in range to have enough measurements, the autocalibration results will not be trustworthy. After the autocalibration in the Creator Controller, you can visually verify whether the result seems correct. Additionally, the software will inform you about the quality of the autocalibration.