Discover and autocalibrate
Introduction
With both your software and hardware installed, it’s time to connect the two. If by chance you don't have the anchors set up, please do so as instructed here.
In this section, we’ll discover all the Pozyx devices in range and let the anchors autocalibrate. For these steps, we’re using the ‘Anchor coordinates’ section of the Setup, which you can find under Rollout.

Discovering your devices
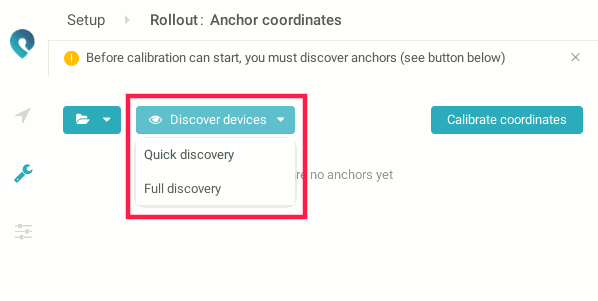
The Pozyx connected to your computer can perform a ‘discovery’ broadcast which will find all devices in range. You can give this command in the Anchor coordinates page.
There are two options:
Quick discovery: The quick discovery performs a discovery on the locally configured UWB settings and will find devices on those settings. It typically takes around 2 to 3 seconds.
Full discovery: the full discovery goes over all the possible UWB settings and is intended to find Pozyx devices on other UWB settings. It takes about 10 seconds.
The full discovery is recommended if you don’t find all your devices with the quick discovery.
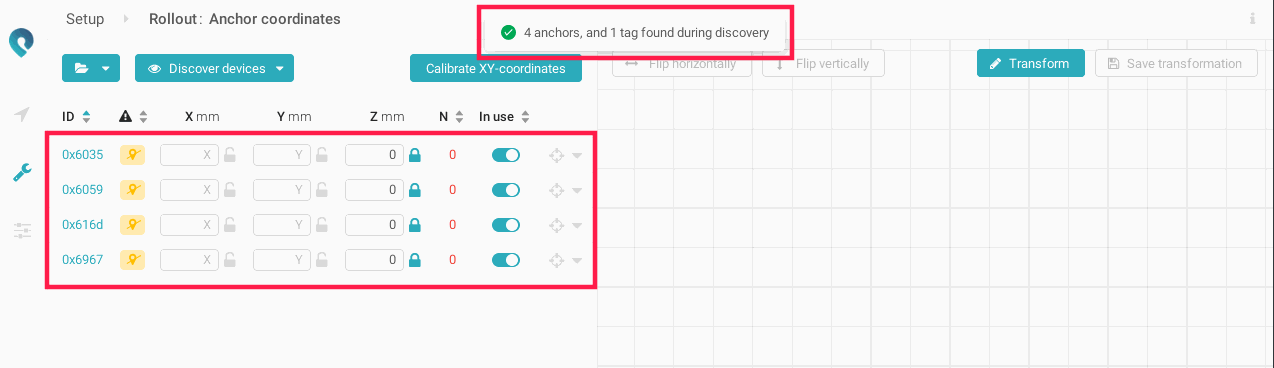
If all goes well, you will discover the four anchors you installed and at least one tag. If you don’t pick up on all your devices, check whether they are in range/line of sight and are powered on. If they are, try a full discovery.
The anchors should show up as a list with empty coordinates, with the Z coordinate 0 by default. In the next step, we will auto-calibrate the anchor’s positions.
Autocalibration
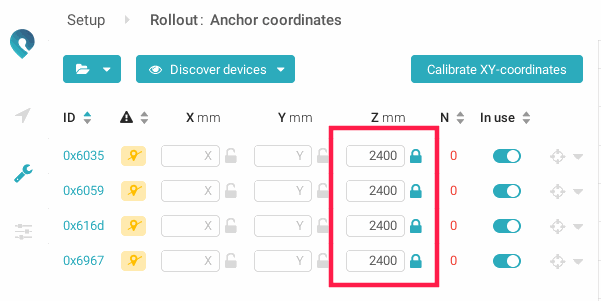
It’s tempting to push that ‘Calibrate XY-coordinates’ button right away, but we need to do one important thing first: setting the heights of the anchors. By default, the anchor height is fixed to 0 as a default value.
In the tutorial setup, all anchors are on a height of 2.4 meters, or 2400 mm. We’ll fill this in. The lock icon after the coordinate means it won’t change during the autocalibration.
After setting your anchor heights. it’s finally time to press that ‘Calibrate XY-coordinates’ button! You will see that the calibration is running.
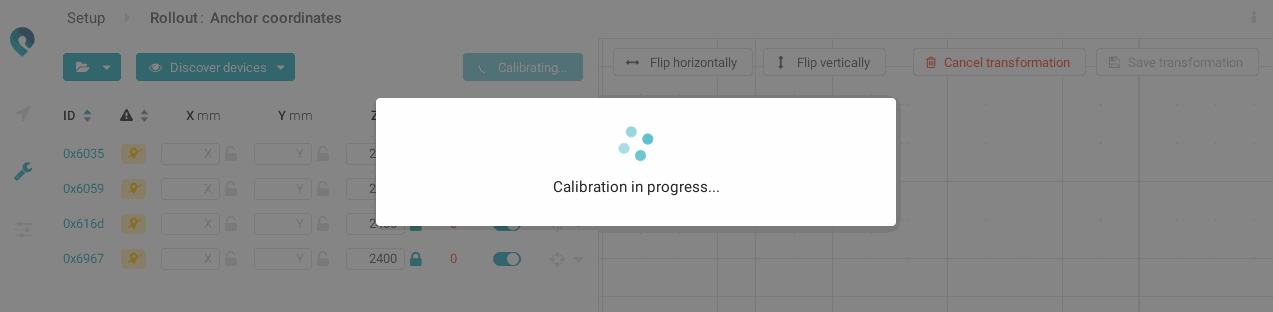
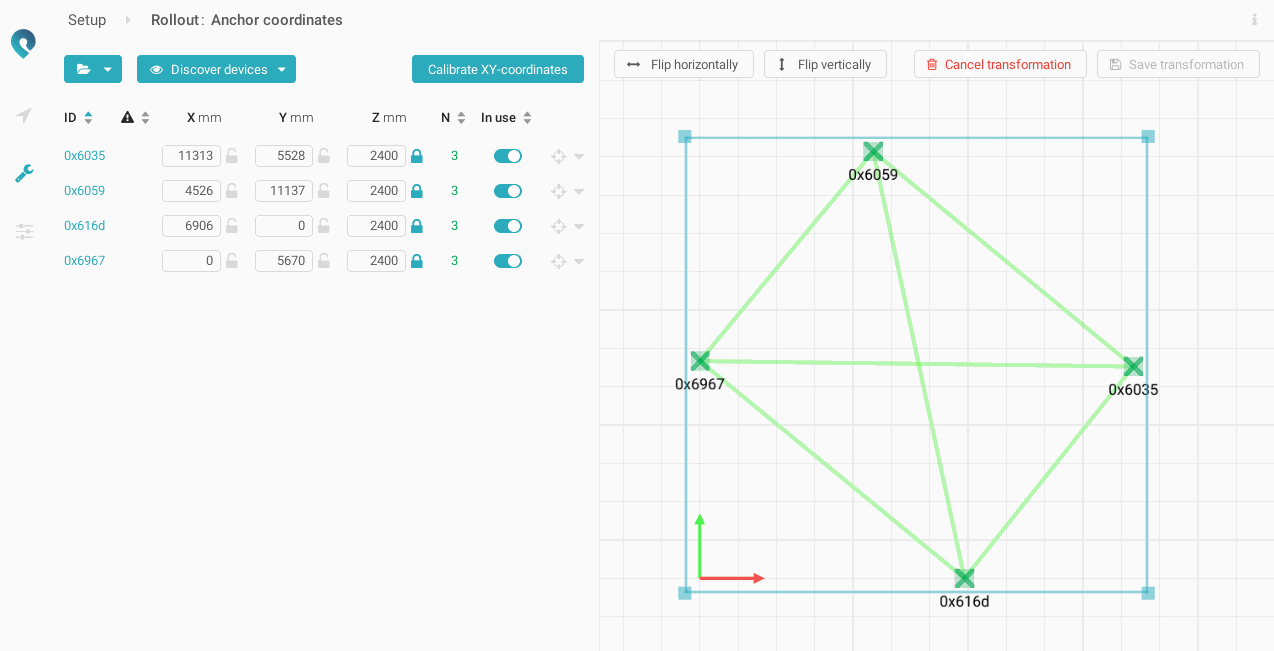
After a few seconds, the autocalibration will finish and you will see that not only your anchors have coordinates, but they’re also visible on the visualisation on the right. If you don’t see your anchors, press one of the crosshair icons next to the anchors. This will center the view on that anchor.
Additional information you can see here is the range measurement’s distance and quality between any pair of anchors, and how many neighbors each anchor has. It’s recommended to have at least 3 neighbors for every anchor when you’re autocalibrating.
You can also rotate and drag the anchors around here, just don’t forget to press ‘Save transformation’ when you’re done.
It’s not possible to scale the anchors, as this would not keep the anchor positions accurate relative to one another. Rotation and translation are non-destructive operations for the relative positions.
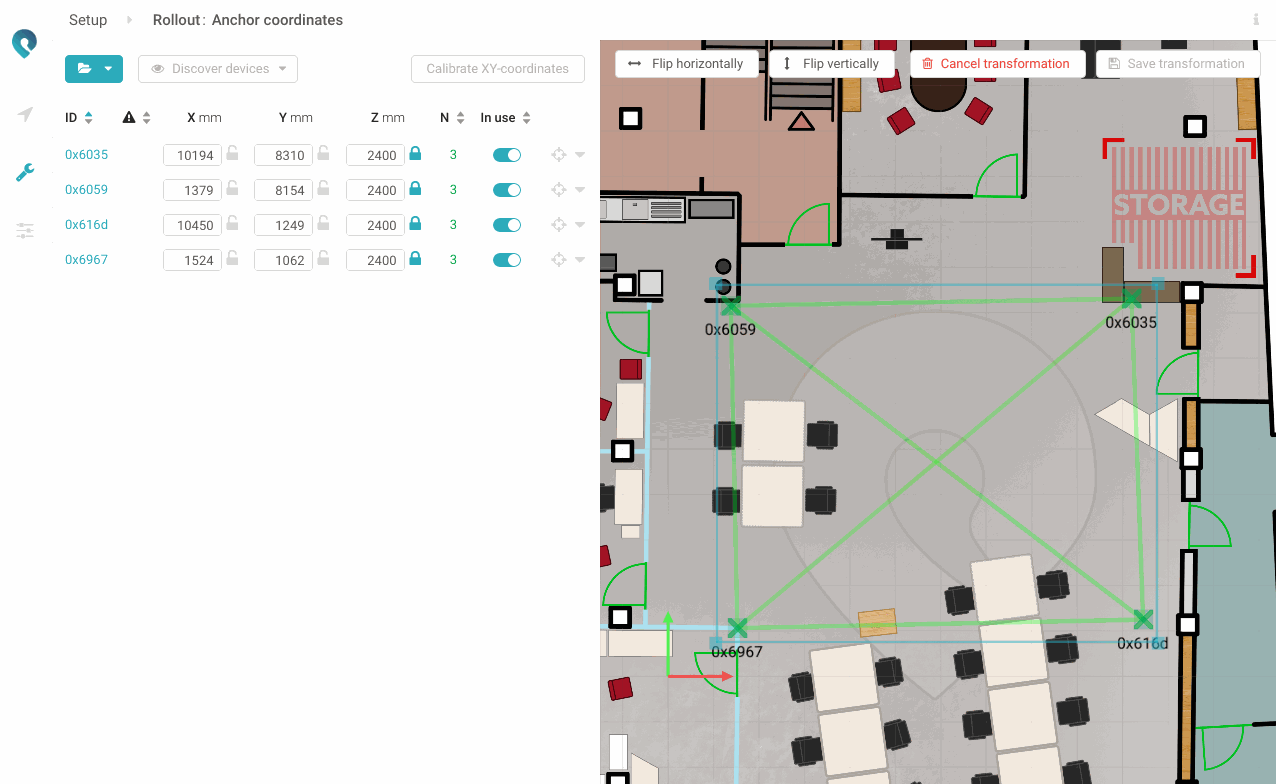
If you have uploaded a floor plan, you can fit the anchors on the floor plan now, saving you the trouble of doing this later. Below you can see the anchors fitted against a floor plan of our office, providing an instant visual confirmation of whether these positions are accurate.
Now, it’s time to start positioning!