Creating triggers
Creating a trigger area
Triggers will be generated based on tags entering or leaving a zone. Zones used for triggers should be of the type ‘Trigger area’. Zones of type ‘Obstruction’ and ‘Positioning area’ will not generate any triggers.
Therefore a trigger area must first be defined on your floorplan.
Go to setup and choose zones under the planning tab.
Click on the ‘plus’ button to add a new zone and choose ‘Trigger area’ as zone type.
Select the ‘add points’ button to draw the trigger area on the floor plan
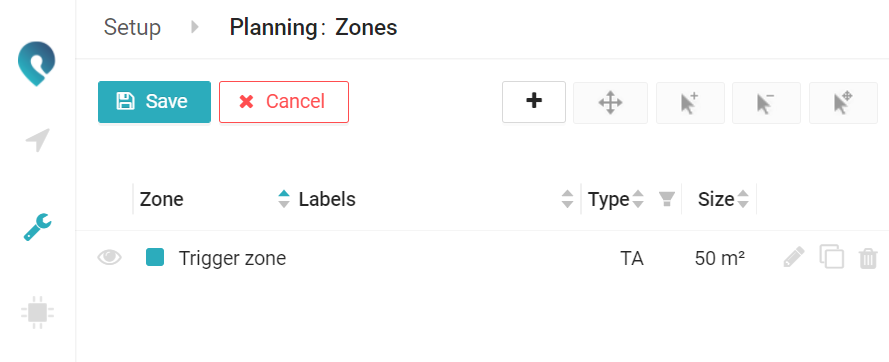
A more detailed explanation on zones can also be found in Defining zones.
Adding triggers
Go to triggers to setup the triggers
There are 2 ways to add a trigger:
the + next to the trigger zone
the button ‘add trigger’
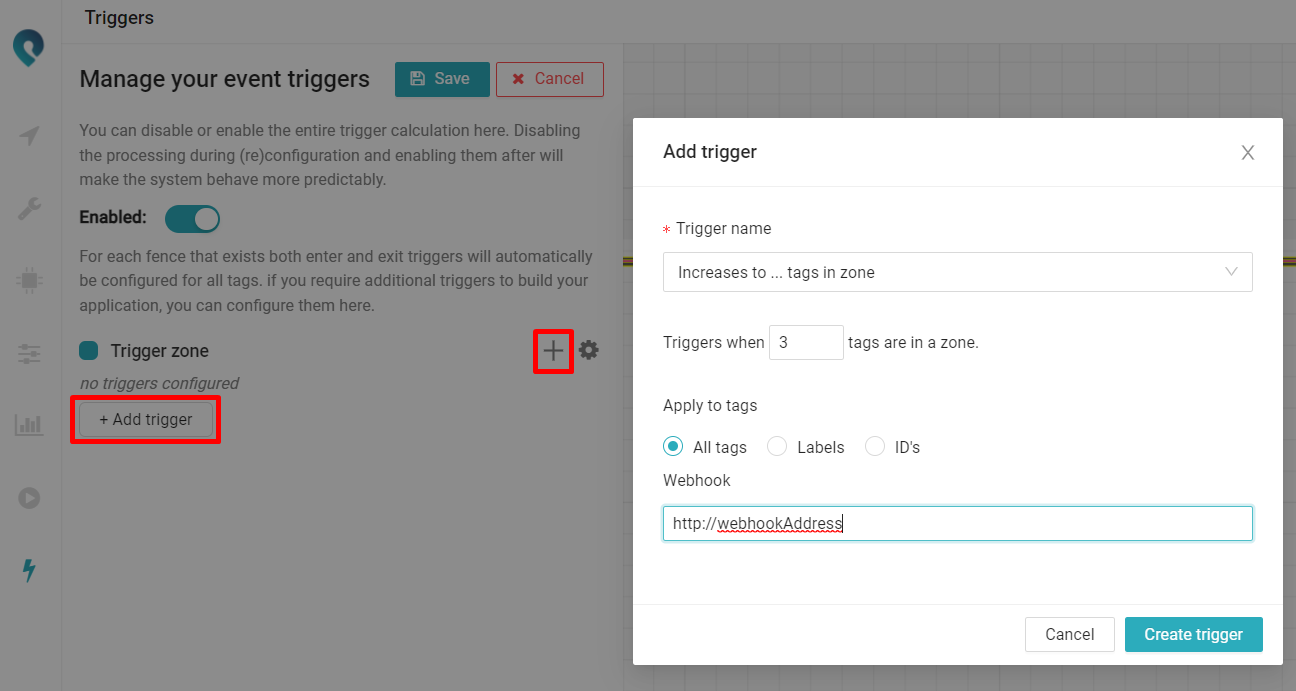
Two different triggers are currently available: the ‘Increase to … tags in zone’ and ‘Decrease to … tags in zone’. A trigger in the form of a webhook1 will be sent respectively if the number of tags in the zone has increased to or decreased to the given number of tags.
E.g. when an ‘increase to 3 tags in zone’ trigger is configured, a webhook will be sent to the specified url (Webhook field) when (and only when) a third tag enters the zone.
If you would also require a trigger if the amount of tags goes from 4 to 3 in the zone, a ‘decrease to 3 tags in zone trigger’ must be configured in addition.
Selecting which tags influence the trigger
Sometimes it can be useful to apply the trigger functionality to only a selection of all tags.
A trigger can be configured to be applicable to:
All tags (default)
Tags having a certain label or labels
A specific set of tag IDs
E.g. you want to receive a trigger when a max amount of products of type ‘A' has entered a certain trigger area. This can be obtained by giving all tags attached to product A the same label. Next, the setting ‘Apply to tags’ must be set to ‘Labels’. Then, fill in the label you have chosen for all products of type A.
Trigger settings
For every trigger area some general trigger (of ‘Fence’) settings can be defined by clicking on the gear icon.
A webhook for enter & exit events can be set which will apply to all tags entering or leaving the zone. So every time a tag crosses the boundary of the trigger area an http callback will be executed to the specified url.
Settings regarding the trigger sensitivity.
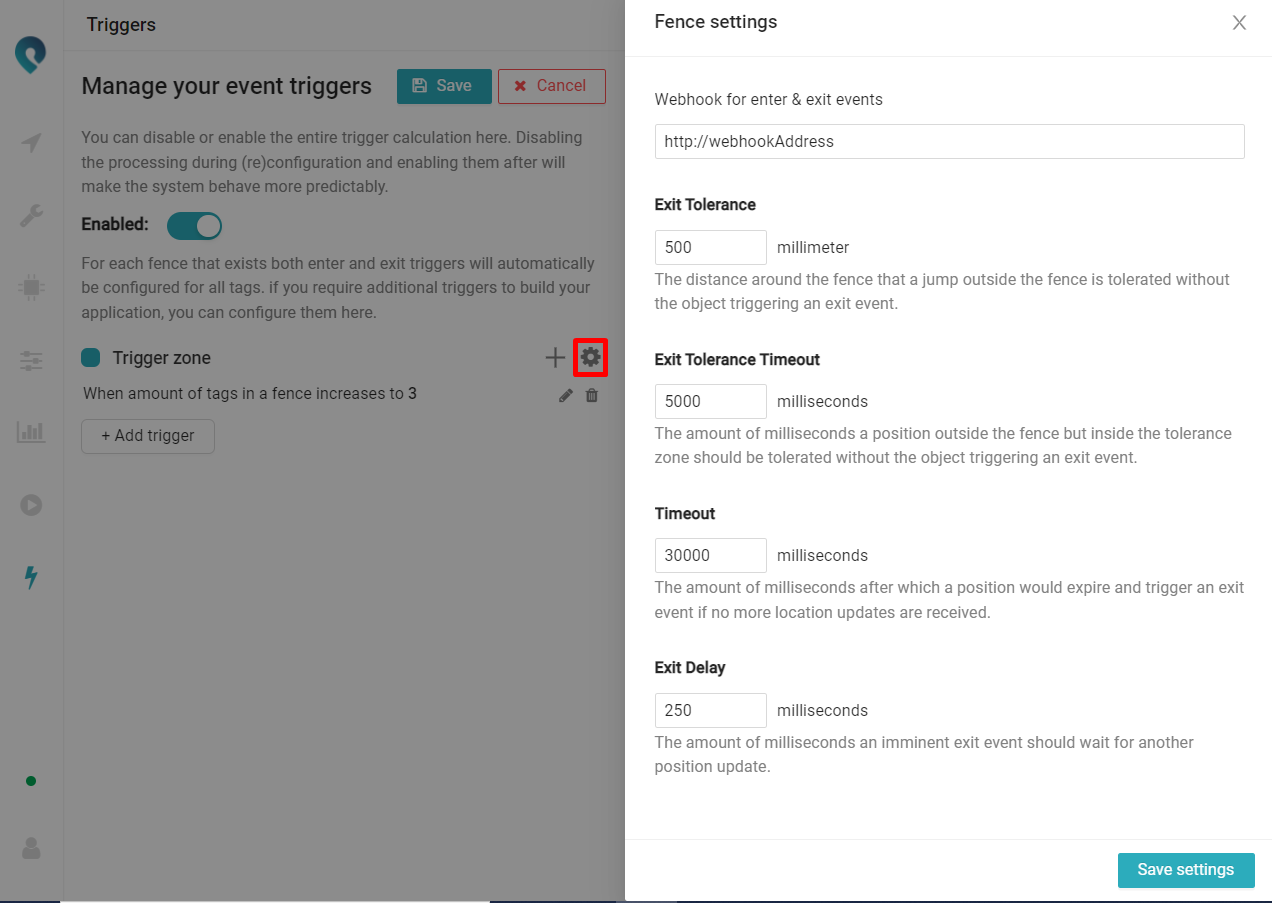
A webhook URL should be added for the triggers to work, even when only using the MQTT stream. A dummy webhook URL can be entered in that case
1 The trigger information of all tags is also available in a separate MQTT stream by subscribing to the topic ‘triggers/trigger/+’