Installing without internet access
Before starting with the installation of the positioning server it’s important to understand the network interfaces and network requirements of the Pozyx RTLS: Network interfaces & requirements.
Installation
Plug in the power adapter of the positioning server. The standard server uses a 12V power adapter, the compact positioning server uses a 5V power adapter. The positioning server will automatically turn on. Both servers have a LED which will turn blue to indicate that the server is powered on. On the standard positioning server this LED is located on the front, on the compact positioning server this LED is located next to the power port.
Connect the positioning server to your local network by plugging in an ethernet cable in the uplink network port (Network interfaces & requirements).
Connect your computer to the anchor network by plugging in an ethernet cable in an anchor network port (Network interfaces & requirements).
Open your browser and go to http://10.0.0.254. This will open the Pozyx web application running locally on your positioning server. Note that it may take a few minutes for the positioning server to start up before the application is available.
Go to Devices → Positioning server → Info and scroll down to the Uplink network section to find the details about the uplink network interface.
By default, the positioning server is configured to dynamically obtain an IP address (configured as DHCP client). Please make note of the Local IP address of the uplink network.
If your home or company network utilizes static IP's, you can configure the positioning server’s IP by clicking Edit uplink network configuration.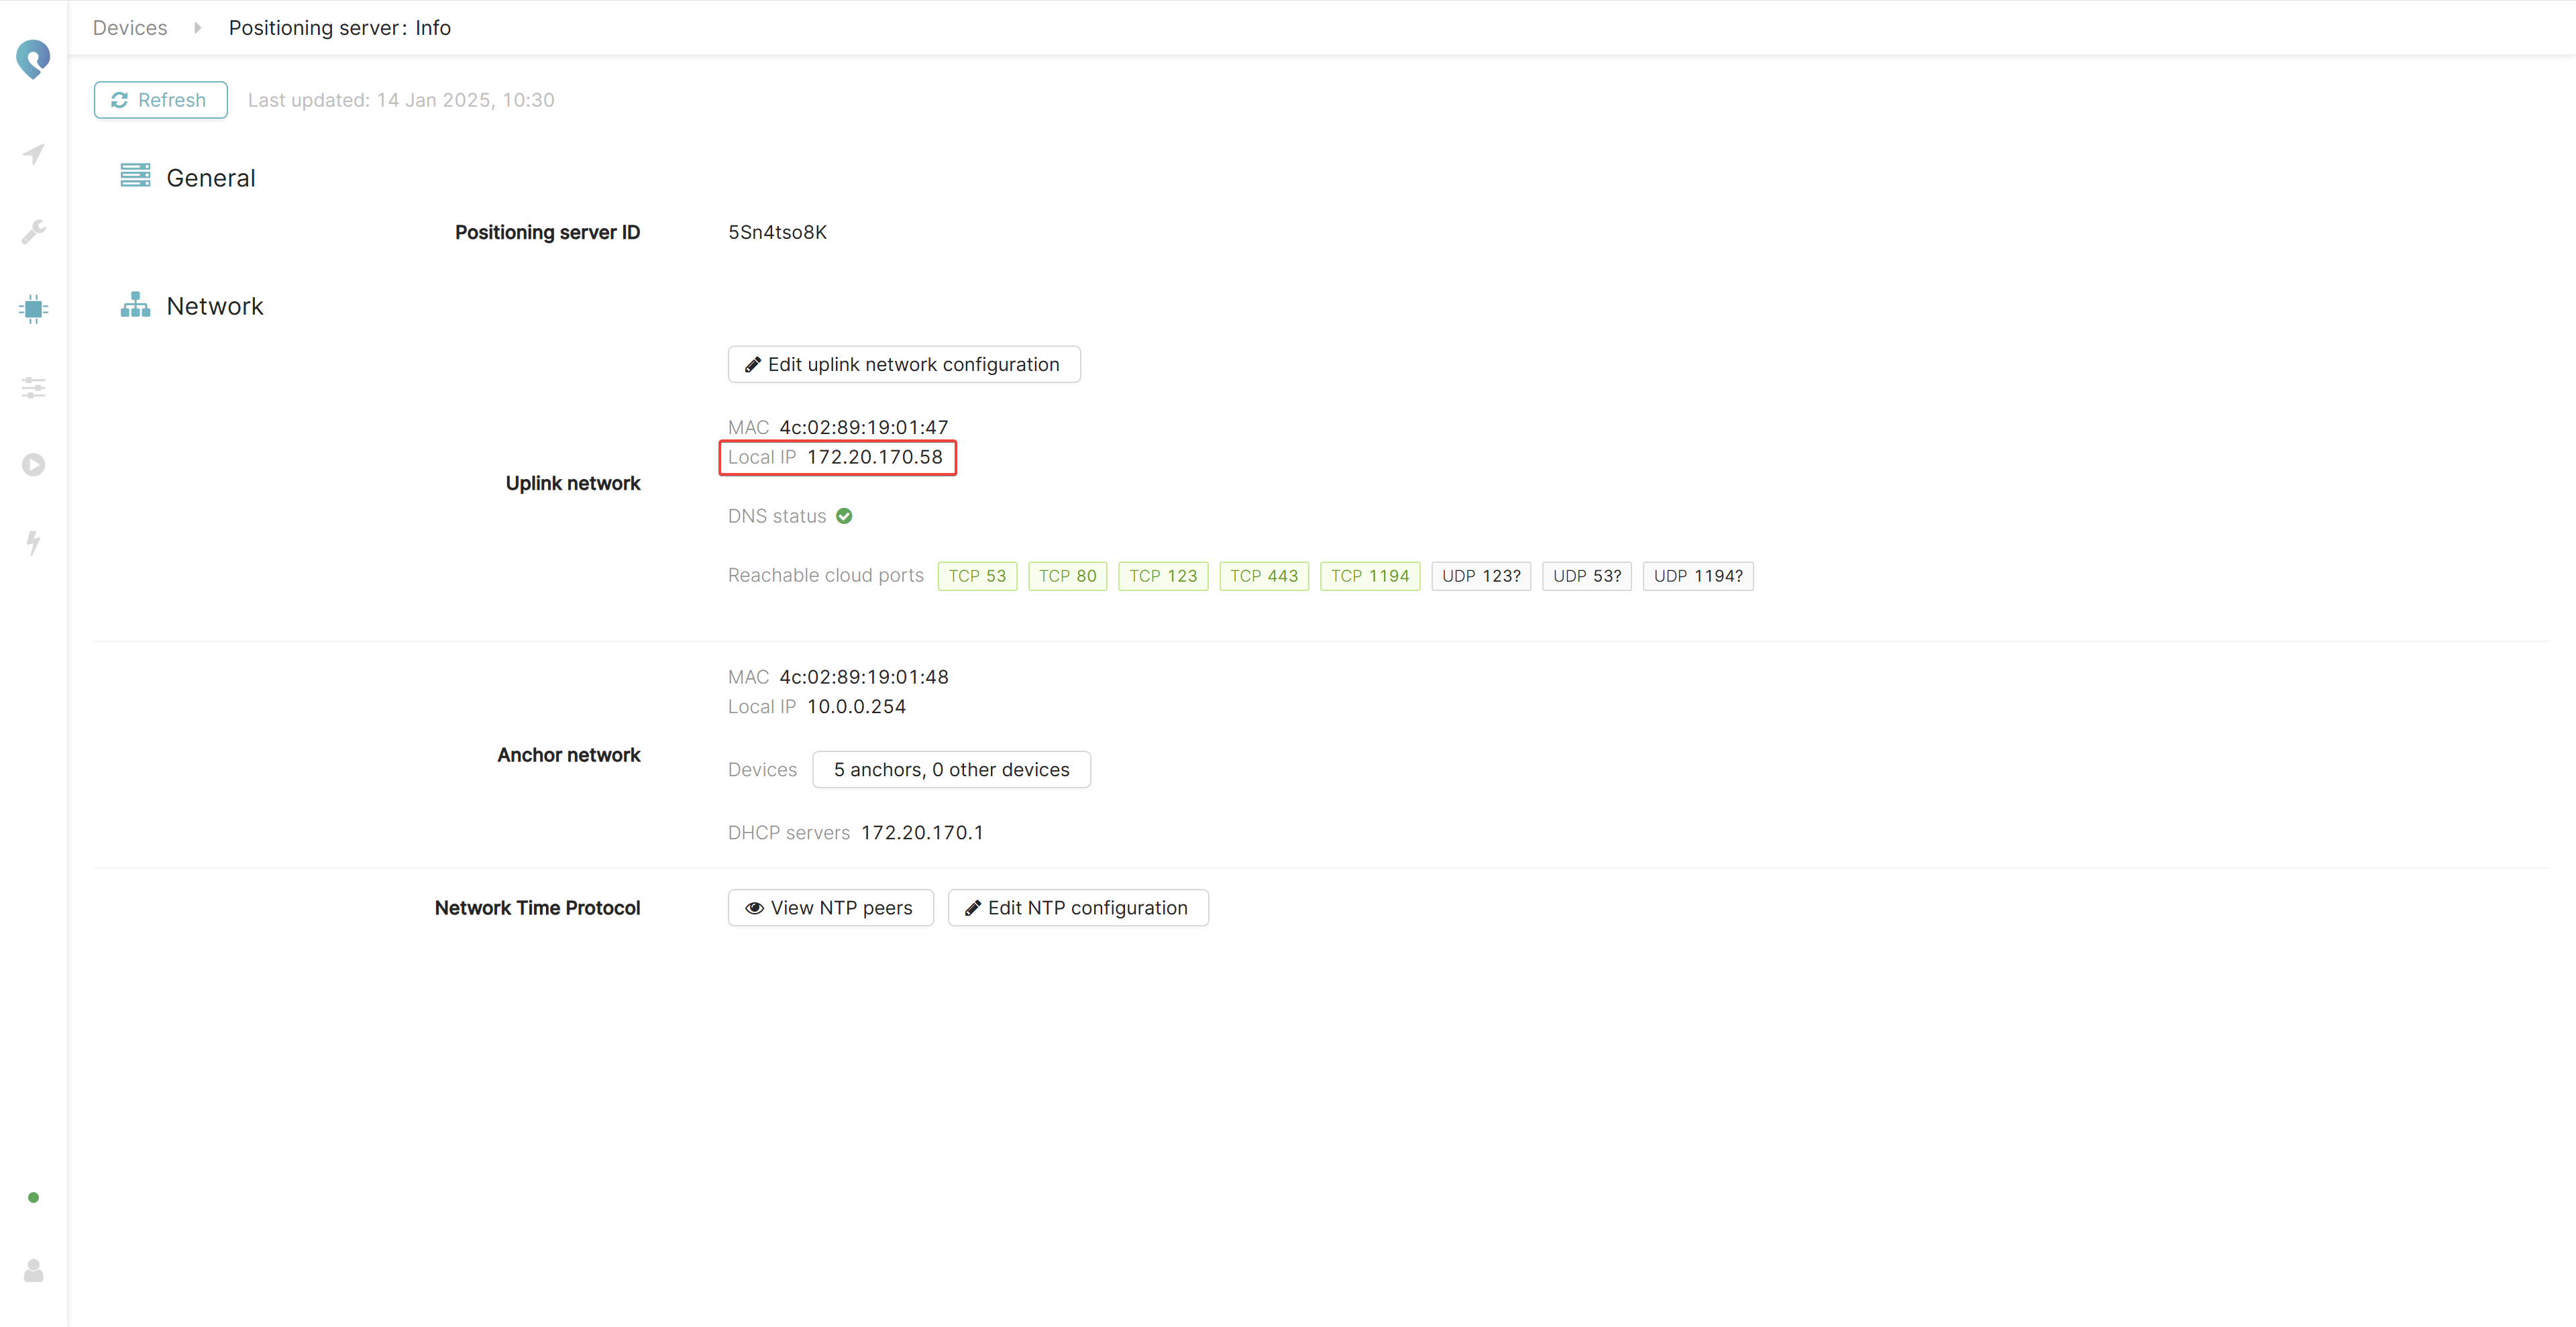
If your positioning server is connected to your local network and internet connectivity is available, the server should automatically connect to the Pozyx cloud. For a proper operation of the Pozyx system from the cloud, make sure that the correct TCP ports are opened if you are using a firewall. The Positioning server: Info page in the web application will highlight the required ports in green if they are accessible, or in red otherwise.Once you have the Local IP of your positioning server you can disconnect your computer from the anchor network. Regardless of whether you have access to the Pozyx cloud or not.
From now on, you can access the Pozyx web application in two ways:
Locally1: By connecting your computer to your local network (the network attached to the positioning server’s uplink network port) and surfing to the Local IP address of the server.
From the cloud: By going to https://app.pozyx.io. Here you can create an account (or use an existing one) and link your positioning server to your account. For this, you will be asked for the positioning server ID that is printed on the positioning server. See the instructions in Chapter 2.1 – Quick positioning server setup for more info on this.
This option will only work if your positioning server has gained access to the Pozyx cloud (see step 5).
It is recommended to not use the anchor network to access the setup application once installed as this may affect system stability.
1 Note that, locally, some features of the web application are not available such as the setup validation and user management to give multiple people access to the setup application. In contrast to the cloud-based web application, your local web application is also not automatically updated, but only when you update your positioning server’s software. This means that the cloud-based web application may have a different and newer version than your local one. For a more detailed explanation about the differences, check out this page.