Configuring the tags
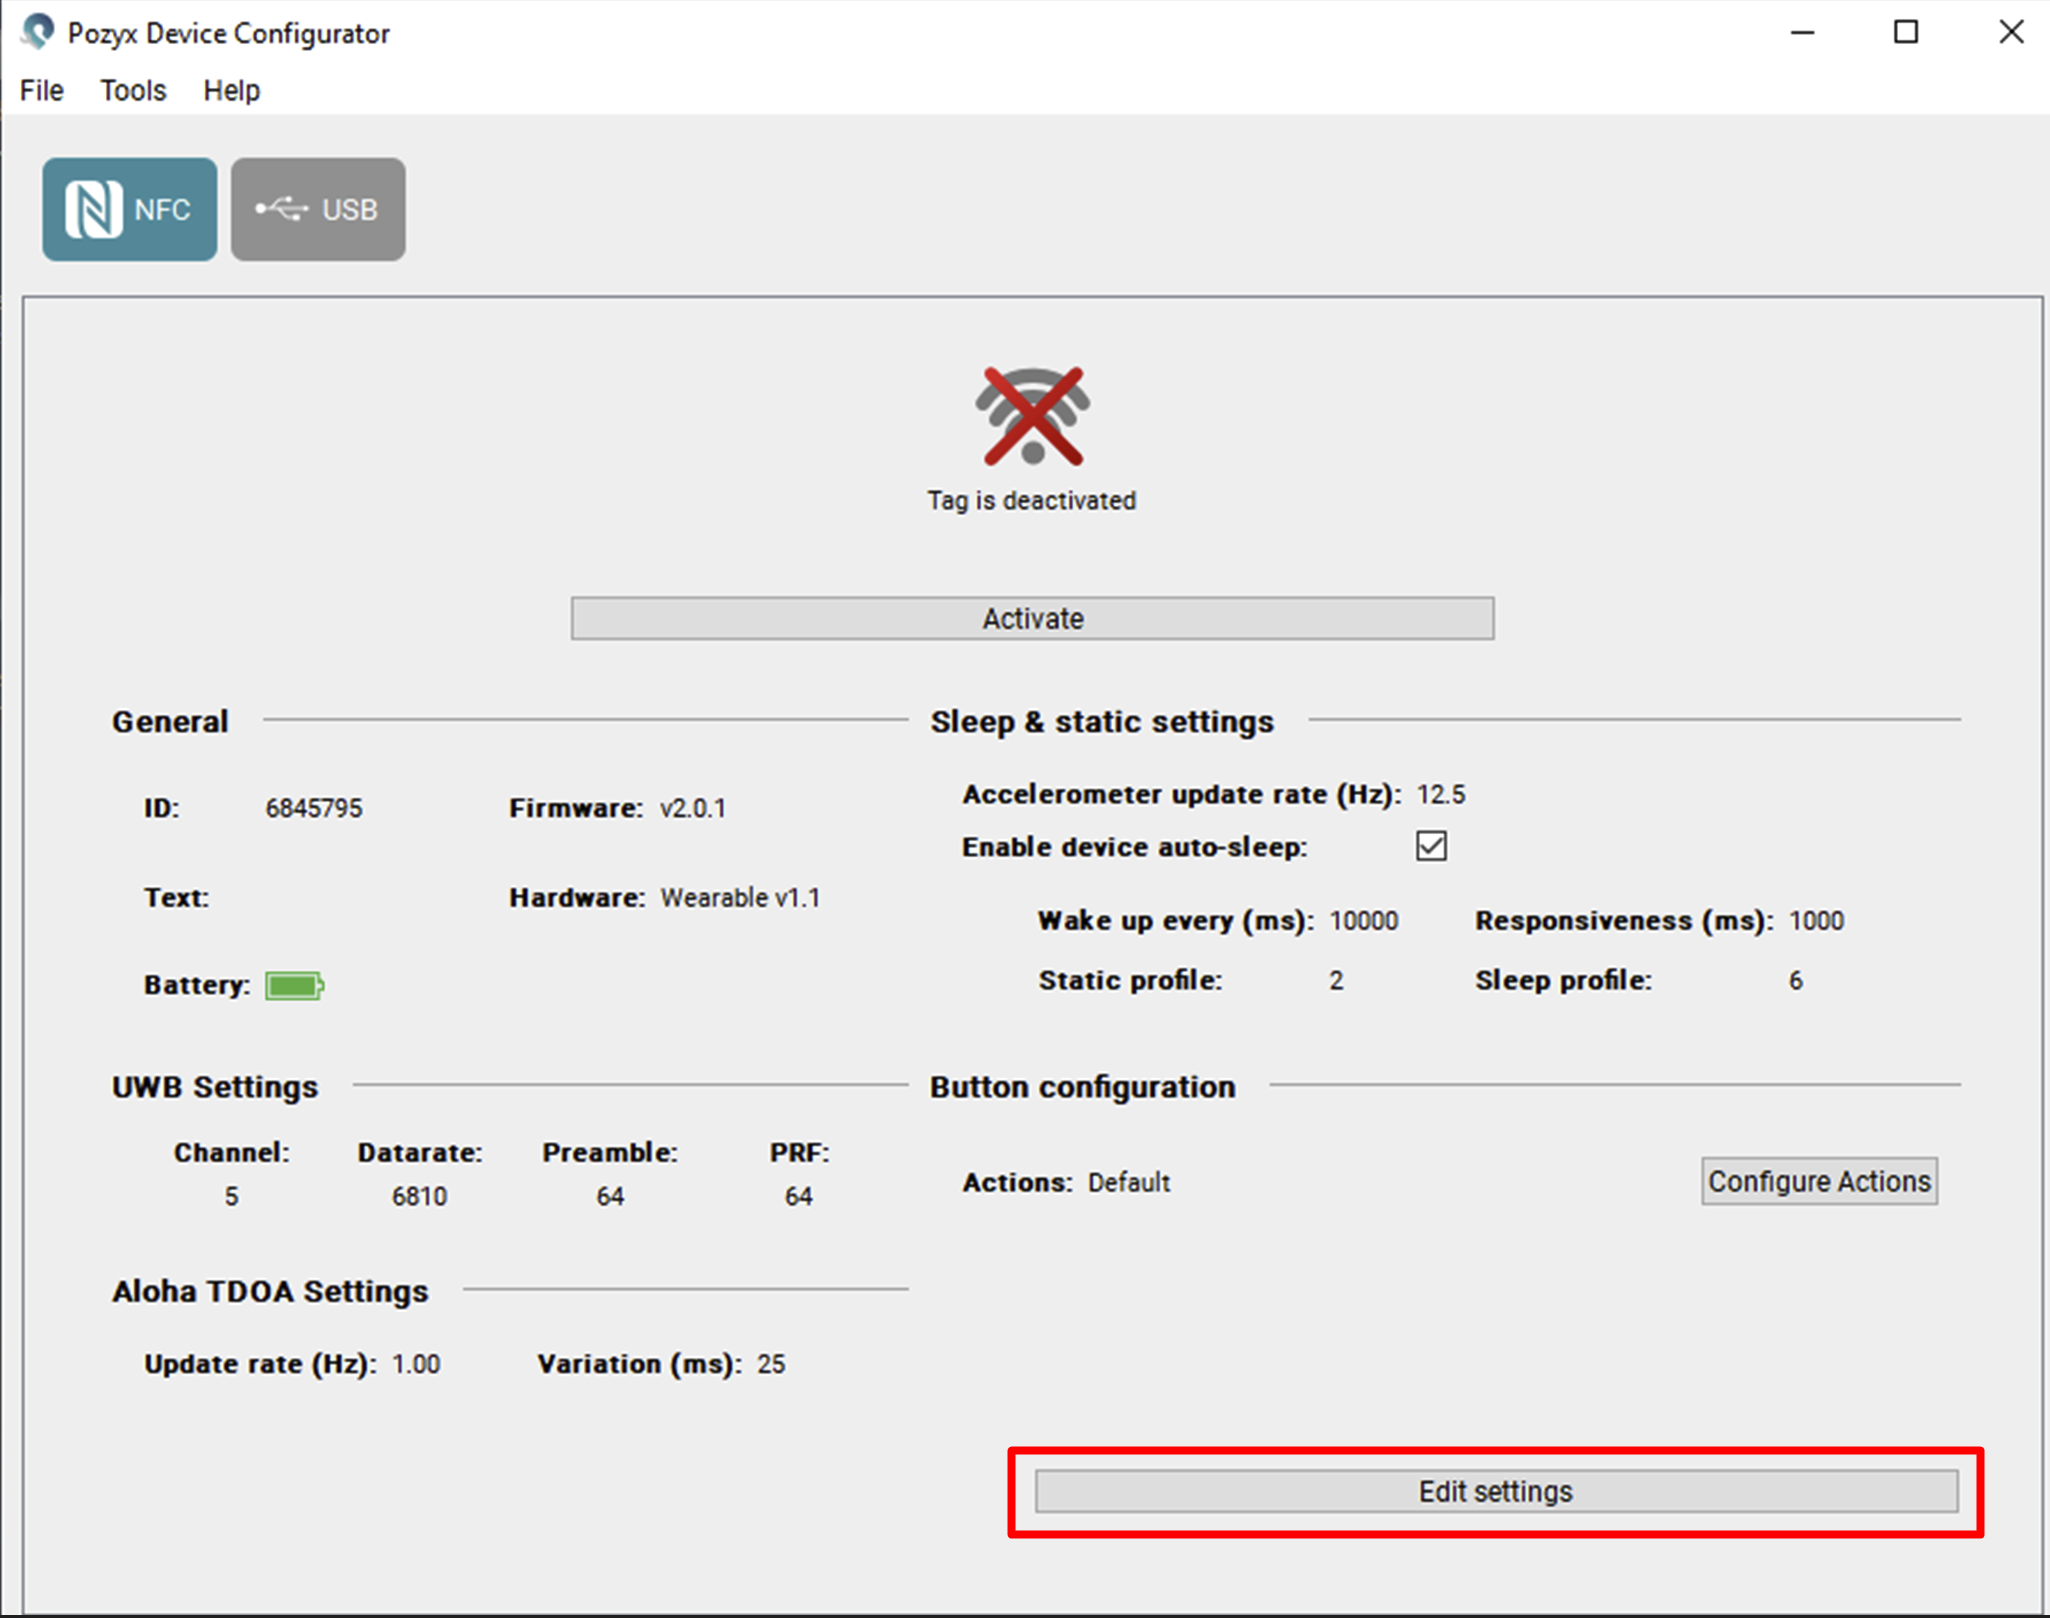
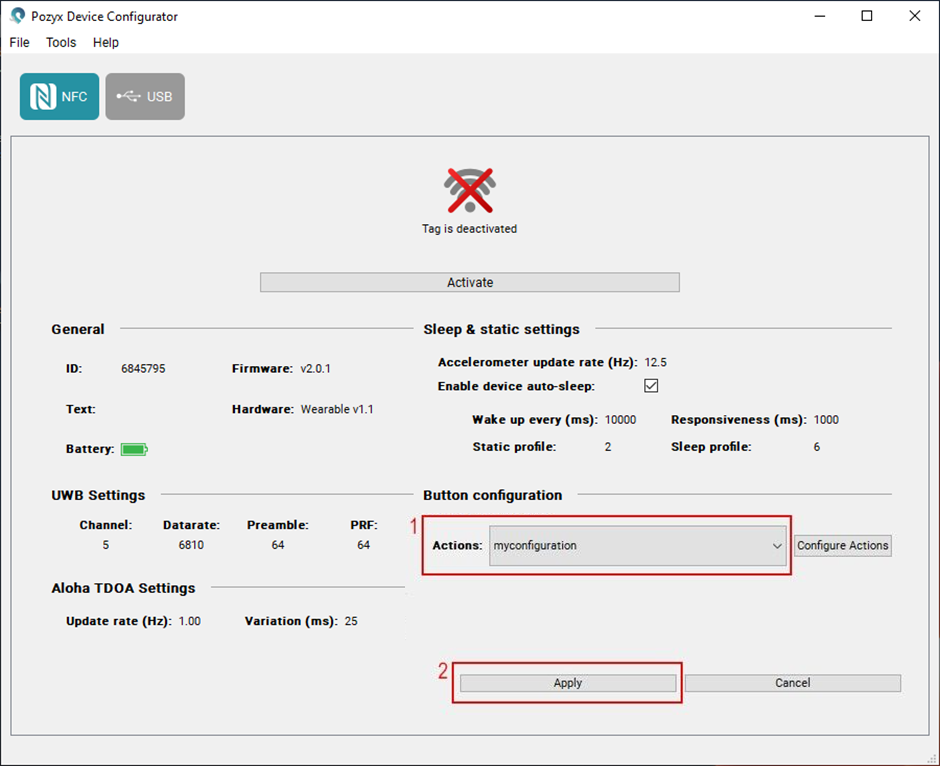
After starting the Pozyx Device Configurator, connect the tag to your computer. The Wearable Tag or Industrial Tag should be placed on the NFC reader, which is connected with USB to your computer. The settings of your tag will become visible once the tag is placed on top of the NFC reader and NFC is selected in the device configurator. The settings that you will see depend on the tag you're using.
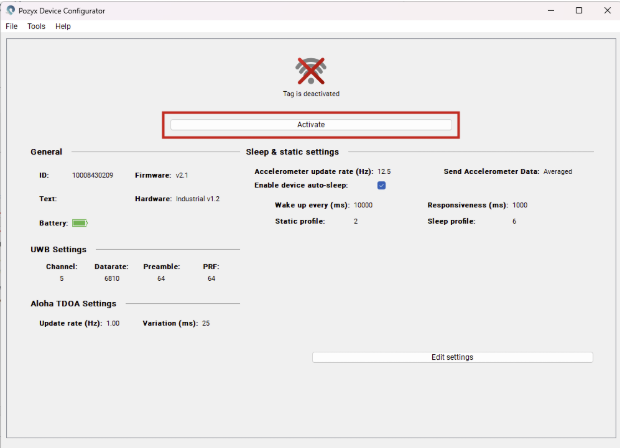
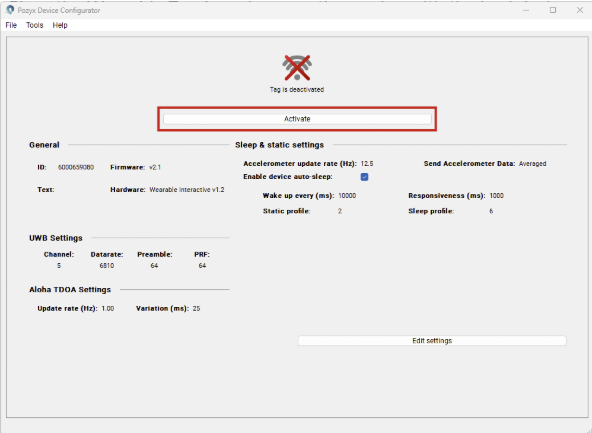
This tool allows you as well to activate or disactivate the tag by pressing the button ‘Activate’/'Deactivate'.
General
The unique tag ID, firmware/hardware version, and battery level of the tag can be checked. Additionally, there is the option to enter text into a field associated with the tag. This field can be used to provide additional context when checking the tag with the device configurator. It is important to note that the text field is an internal parameter only and is not included in the UWB packet transmitted to the system.
UWB settings
The Ultra-Wideband (UWB) settings of the tag must match the UWB settings of the anchors in order for the system to function. It is, however, not possible to alter the UWB settings of the tag due to certification reasons. If the UWB settings of the tags and anchors would not match, please contact us through http://support.pozyx.io for assistance.
Aloha TDOA settings
With these parameters, you can configure the update rate of the tag and control the variation. The update rate is the number of times per second a new positioning transmission is sent. One position transmission is called a ‘blink’. Increasing the update rate can improve positioning accuracy, especially for fast-moving assets, but it will also decrease battery life. For most applications the default update rate of 1Hz is sufficient.
The variation is a parameter to reduce the possibility of packet collisions between multiple tags. Keeping this to 25 ms should be fine in most cases.
Sleep & static settings
Industrial and Wearable Tags with firmware v2.0 and higher have the ability to enter sleep mode to conserve battery power. This feature can be enabled by checking the 'Enable device auto-sleep' box. The built-in accelerometer will then detect when the device is static, after which the update rate will be reduced to the sleep update rate, which can be specified with the 'Wake Up Every (ms)' setting.
You can also customize the tag's responsiveness to movement while in sleep mode with the 'Responsiveness (ms)' setting. To fine-tune the sensitivity of movement detection, you can select one of several profiles ranging from 0 to 7. Profiles 0 to 3 are designated as static profiles, with 0 being the most sensitive and 3 being the least sensitive. Profiles 4 to 7 are designated as sleep profiles, with 4 being the most sensitive and 7 being the least sensitive. For example, selecting profile 0 will cause the device to be highly sensitive to movements. Then the tag will wake up and become visible even when the smallest movement is detected. On the other hand, selecting profile 3 will cause the device to be less sensitive to movement, so that very small movements might not trigger the wake up threshold.
It is recommended to use the default values of 2 for the static profile and 6 for the sleep profile in most use cases.
Accelerometer data
The accelerometer data that triggers the sleep function is the same data sent in the TDOA blinks, and you can also access it through the MQTT stream. The accelerometer measures movement in three directions (X, Y, and Z), so each update gives you three values. These values are in milli-G’s (mg). The sensor can detect movement between -2 G and +2 G, which means it can pick up both small and fairly strong movements in any direction.
Accelerometer update rate: allows you to change the accelerometer update rate. The accelerometer is configured independently from the positioning update rate (TDOA update rate)
Send Accelerometer Data1: this setting has three options: Off, Averaged and Raw.
Off: no accelerometer data is included in a TDOA blink
Averaged: one TDOA blink contains a single accelerometer value. This value is the average of all accelerometer measurements taken between two blinks. This is the default setting.
Raw: All accelerometer measurements since the last TDOA blink are included in a TDOA blink. We recommend that the TDOA update rate and the update rate of the accelerometer are roughly aligned as one TDOA blink can contain maximum between 27 and 30 accelerometer measurements. The exact number depends on other variable content in the blink. This means that e.g. if we have an accelerometer update rate of 25 Hz and a TDOA update rate of 0.5 Hz, 50 measurements will need to be sent in one blink. If this situation occurs, the tag will throw away the first 20 to 23 measurements and only transmit the last 27 to 30 measurements. If you don’t want to lose any accelerometer updates, make sure your update rates comply with the following formula: (Accelerometer update rate (Hz))/(TDOA update rate (Hz)) < 27
Button configuration
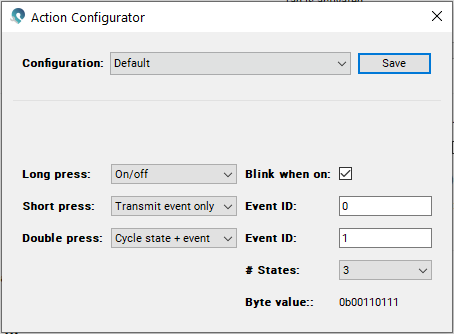
The Interactive edition of the Wearable Tag has a button that can be used to:
Turn it on and off
Cycle between states
Send out events
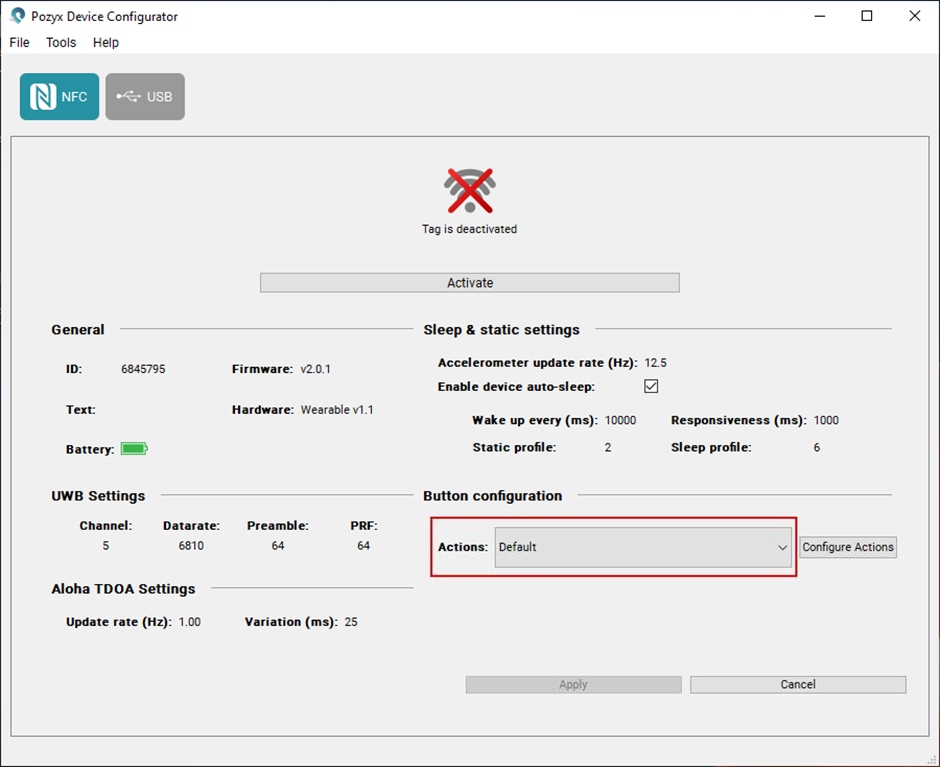
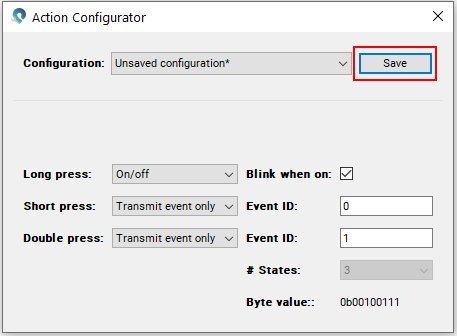
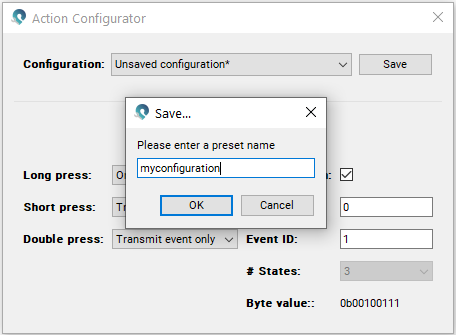
With the Pozyx Device Configurator you can customize this behavior to best suit your needs. Press the Edit settings button to get started.
Battery impact
The TDOA update rate is the most significant factor affecting the battery life of all tags. The higher the update rate, the shorter the battery life will be. The accelerometer update rate also has a minor impact on battery life. The more updates that are sent, the more battery capacity will be used. For the Interactive Wearable Tag, disabling the LED blink feature can also slightly improve battery life. At room temperature, you can expect the battery life of all tags to be as follows:
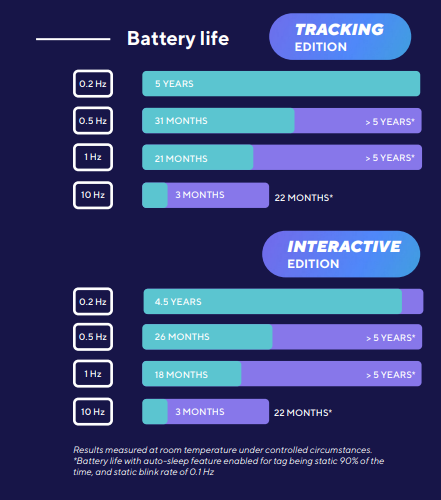
Wearable Tag
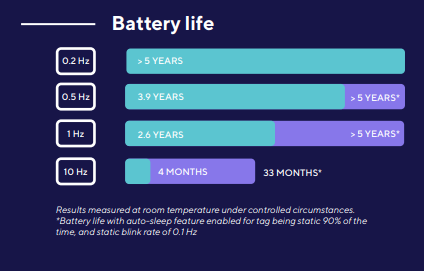
Industrial Tag
Bulk configurator
Configuring a large amount of tags is a time consuming job with the method described above. Therefore the Device Configurator has a bulk configuration option. The settings only have to be entered once and will be applied on every tag that is placed on the NFC reader.
Press the tools button and select Bulk NFC Configure to get started, this will open a separate screen in which all the settings described above can be enabled, disabled or changed. Make sure the correct hardware type and firmware version are entered, these can be found while reading out one of the tags. Once the correct settings are entered, press the start button to start configuring the tags.
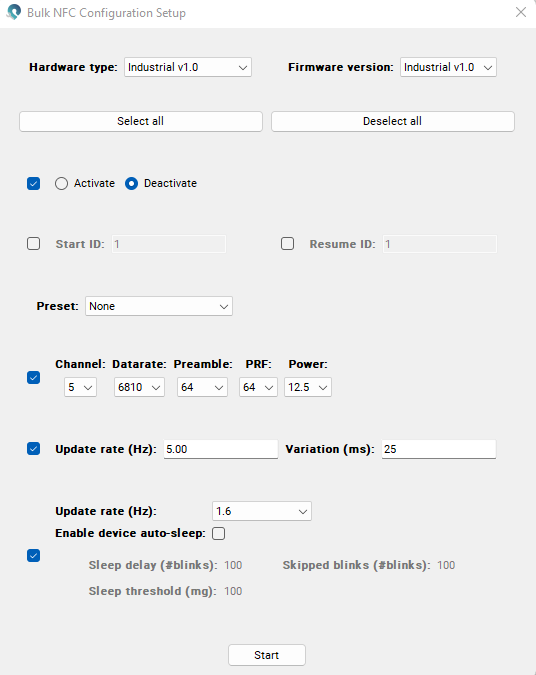
After pressing the start button, the screen will look like this without a tag
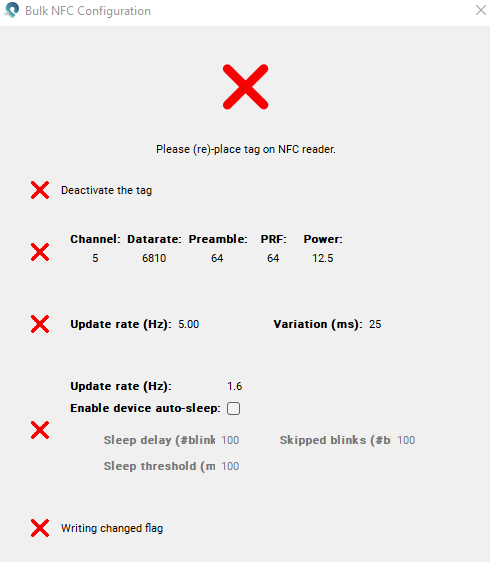
When a tag is placed on the NFC reader, the progress of writing the settings will be visible by the green checkmarks that replace the red crosses. Once all settings are changed the screen will look like this:
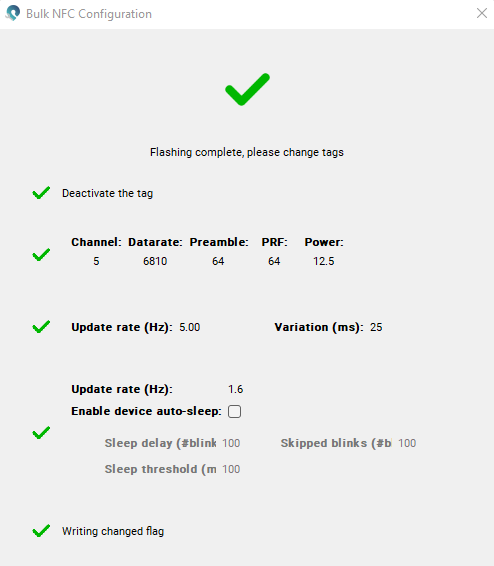
The settings of the tag were successfully changed and the next tag can now be placed on the NFC reader.
1 From tag firmware v2.1 the options of averaged and raw accelerometer data are available. In earlier versions only the raw is available

