Troubleshooting the positioning server
The positioning server does not get a connection to the cloud
When the positioning server does not get a connection to the cloud it’s probably related to a misconfiguration of the uplink network (either in the positioning server or in the network itself). Follow these steps to check whether the server is receiving an IP address and whether the network configuration is correct:
Connect your computer to the anchor network by plugging in an Ethernet cable in an anchor network port (labeled ANCHOR NETWORK).
Open your browser and go to http://10.0.0.254. This will open the Pozyx web application running locally on your positioning server. Note that it may take a few minutes for the server to start up before the web application is available. If the web application does not become available, follow the instructions further below.
Go to Devices → Positioning server → Info page and scroll down to the Uplink network section to find the details about the uplink network interface.
Verify whether the positioning server has received an IP address and whether all the TCP ports are green:

The positioning server has no local IP
If the positioning server did not receive an IP address, then it’s either not connected to your local network via the UPLINK network port, or there is no DHCP service running on your local network. Most problems related to networking are caused by bad cables, so double check your ethernet cable by using it to connect your laptop to the local network and check whether you can browse the internet with it (make sure you are not connected to the WiFi when doing this). If the cable works, verify the DHCP service with your network administrator.
Not all ports are green
If not all ports are marked as green then first check the uplink network configuration on the positioning server:
Click on the Edit uplink network configuration button:

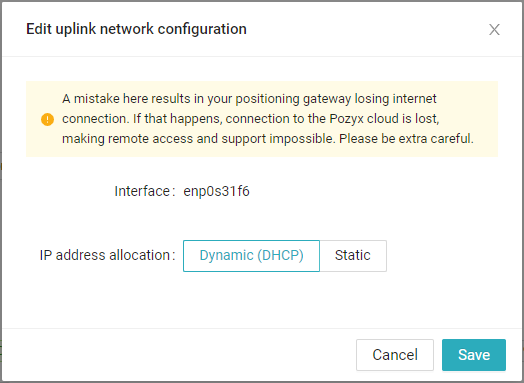
Verify that you have selected the Dynamic (DHCP) IP address allocation:

Only select Static IP address allocation if you know what you’re doing.
If you had selected Static IP address allocation and you switched it to Dynamic (DHCP), you will have to reboot your positioning server (unplug & plug the power) for the changes to take effect.
If everything is configured correctly, and you can still not reach it via the cloud, then first check whether you have an internet connection on your local network: Plug in your laptop to the local network with an Ethernet cable, and verify whether you can browse the internet with it (make sure you are not connected to the WiFi when doing this).
If there is an internet connection, but you can not reach the positioning server via the cloud, then your firewall might be misconfigured. The list of required/optional ports and their function can be found here: Network interfaces & requirements. Verify the network ports with your network administrator.
The web application does not load via the anchor network
If you plugged in your laptop to the anchor network port and you can not reach the web application by surfing to http://10.0.0.254/ try the following:
Wait a couple of minutes, the positioning server might still be booting.
Double check your Ethernet cable: Connect your laptop to the local network by using this cable and check whether you can browse the internet with it (make sure you are not connected to the WiFi when doing this).
Check the network configuration on your laptop: The positioning server has a DHCP service running on the anchor network interface, so the server will assign your laptop with an IP address. If you have a static IP address configured on the network interface of your laptop, the positioning server will not be able to assign it an IP address, and your laptop will not be able to connect to it. To verify whether you indeed have no static IP address assigned to the network interface of your laptop, do the following:
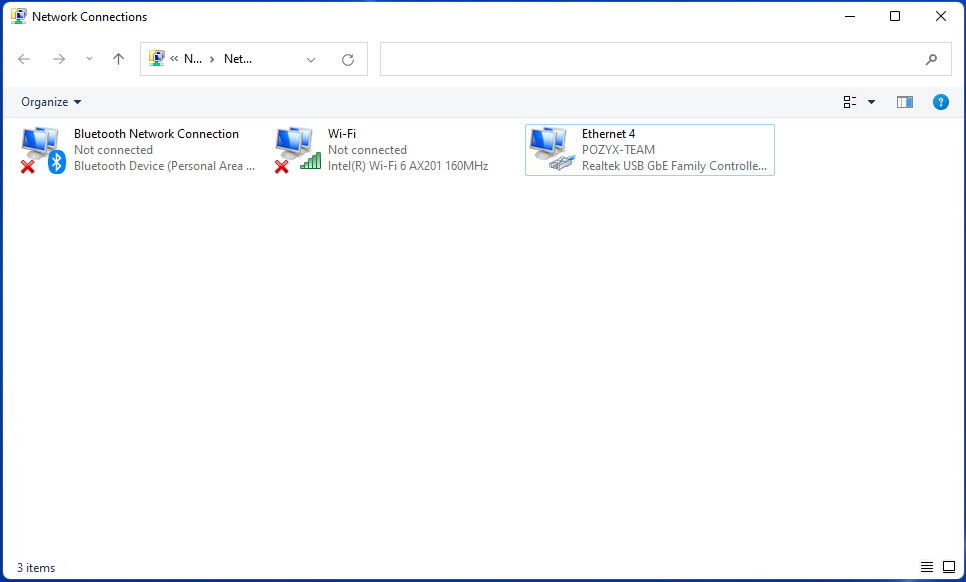
Open the Windows search functionality and search for ‘Network connections’
You should land on the following screen:

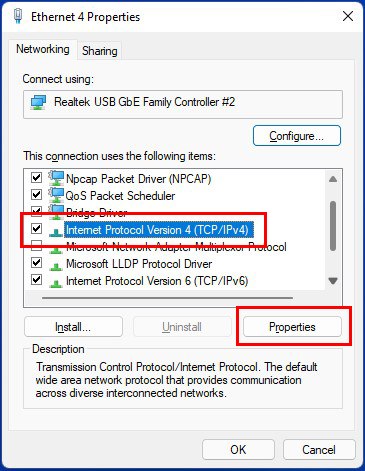
Right click on the network interface that you are using to connect with the positioning server and click on Properties.
You should be prompted with the Properties screen of your Ethernet interface. Scroll down to Internet Protocol Version 4 (TCIP/IPv4) and click on the Properties button:

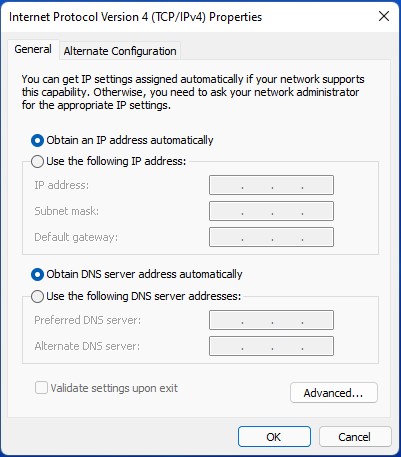
Make sure that the Obtain an IP address automatically and Obtain DNS server address automatically are checked:

